
Preparing the subfloor is a crucial step in ensuring a successful hardwood floor installation. A properly prepared subfloor provides a stable and even surface for the hardwood to be installed, ensuring its longevity and minimizing potential problems such as squeaking or warping. We at Mike’s Custom Flooring would like to discuss the key steps involved in preparing the subfloor before hardwood floor installation.
How Do You Prepare Underlayment & Subfloor for New Hardwood Flooring?
1) Inspect the subfloor. Start by thoroughly inspecting the subfloor for any damage, such as rot, water damage, or unevenness. Repair or replace any damaged areas before proceeding with the installation.
2) Clean the subfloor. Remove any debris, dust, or existing flooring materials from the subfloor. Use a broom, vacuum cleaner, or scraper to ensure the surface is clean and free of any obstacles.
3) Level the subfloor. Check the subfloor for any unevenness or dips. Use a long straightedge or level to identify high and low spots. Fill low areas with a self-leveling compound, following the manufacturer’s instructions. For high spots, sand them down until the subfloor is level.
4) Address moisture issues. Moisture can cause significant problems for hardwood floors, such as warping or mold growth. Perform a moisture test on the subfloor using a moisture meter. Ensure that the subfloor’s moisture content is within the acceptable range specified by the hardwood manufacturer. If the moisture levels are too high, address the issue before proceeding with the installation. This might involve using a dehumidifier or applying a moisture barrier.
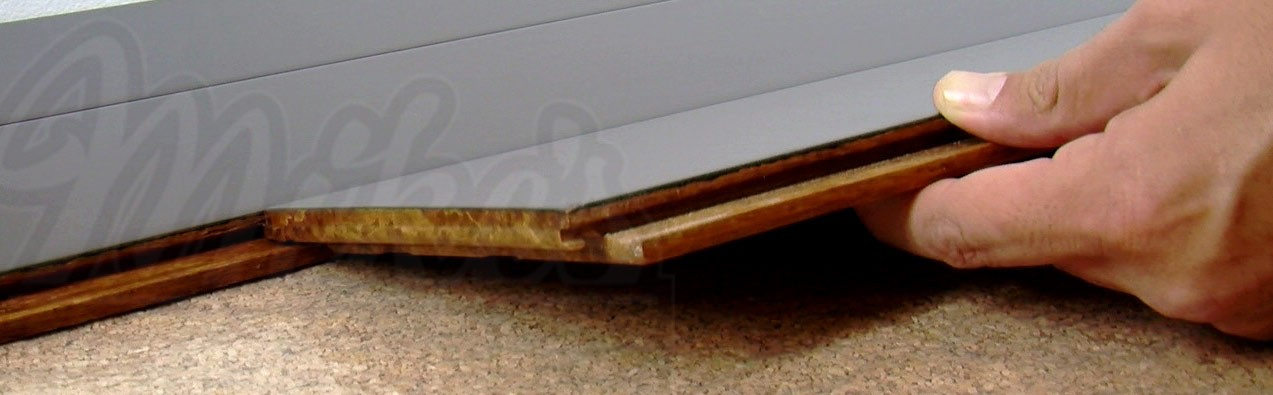
5) Install a vapor barrier. In areas with high moisture levels, it is essential to install a vapor barrier between the subfloor and the hardwood. This barrier prevents moisture from seeping into the wood and causing damage. Use a suitable moisture barrier, such as a plastic sheet or asphalt felt, and ensure it covers the entire subfloor area.
6) Secure loose or squeaky subflooring. Walk across the subfloor and identify any loose or squeaky areas. Drive screws or nails into these spots to secure the subfloor firmly to the floor joists. This step helps prevent movement and reduces the chance of future squeaks.
7) Acclimate the hardwood. Before installation, acclimate the hardwood flooring in the room where it will be installed. This allows the wood to adjust to the temperature and humidity conditions of the space, reducing the risk of expansion or contraction after installation.
8) Check for squeaks. If you’re installing hardwood over an existing subfloor, check for squeaks. Locate the areas where the subfloor and joists may be rubbing against each other and causing noise. Drive screws through the subfloor and into the joists to eliminate squeaks.
9) Clean the subfloor again. Before laying the hardwood, give the subfloor one final cleaning. Ensure it is free of dust, debris, or any other foreign particles that could affect the installation process.
Hardwood Floor Installation, Repairs, Refinishing & More in Charles Town & Eastern Panhandle of Berkeley & Jefferson Counties in WV | Winchester & Frederick County | Round Hill & Loudoun County | Berryville & Clarke County | Herndon & Fairfax County VA
By following these steps, you will have a properly prepared subfloor that is ready for the installation of hardwood flooring. Taking the time to prepare the subfloor correctly will help ensure the longevity and stability of your hardwood floor, providing a beautiful and durable surface for years to come. Mike’s Custom Flooring is readily available to ensure the subfloor is properly prepped and the new hardwood floor is expertly installed. Call us today to get started!