Nail down hardwood floor installation is one of the most popular methods for installing hardwood floors. This process involves attaching the hardwood planks to a subfloor using nails or cleats. Here are the basic steps involved in nail down hardwood floor installation. Today, we at Mike’s Custom Flooring would like to share the basic installation process.
How to Nail Hardwood Flooring
1) Hardwood Floor Installation Preparation: The first step in any flooring installation is to prepare the subfloor. This involves removing any old flooring and ensuring that the subfloor is clean, dry, and level. If the subfloor is not level, it may need to be sanded down or shimmed to ensure a flat surface. If the subfloor is made of concrete, a vapor barrier may be needed to prevent moisture from seeping into the hardwood flooring.
2) Acclimation for Hardwood Floor Installs: Acclimation is a crucial step in any hardwood floor installation. Hardwood flooring is a natural material that can expand and contract with changes in temperature and humidity. To prevent the planks from warping or buckling after installation, they should be allowed to acclimate to the room’s temperature and humidity levels for several days. This allows the planks to adjust to the room’s conditions and ensures a more stable and long-lasting installation.
3) Hardwood Floor Layout: The layout of the hardwood flooring is an important consideration when planning an installation. The planks should be laid out in a way that complements the room’s design and lighting. For example, in a long and narrow room, the planks should be installed perpendicular to the longest wall to make the room appear wider. In a room with natural light coming from one direction, the planks should be laid out parallel to the windows to enhance the natural lighting.
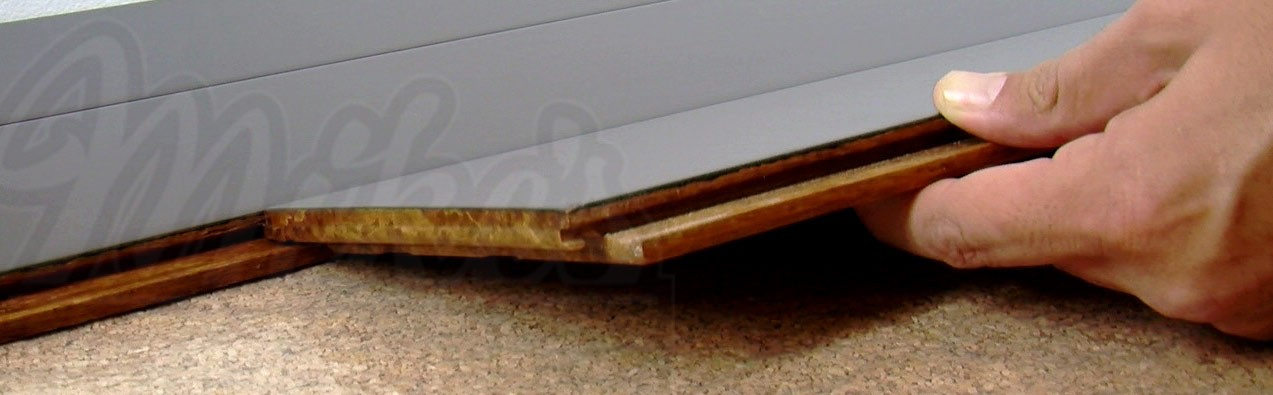
4) Installation of Hardwood Floors: The installation process involves attaching the hardwood planks to the subfloor using nails or cleats. A pneumatic flooring nailer is often used for this task, as it allows for quick and efficient installation. A manual flooring nailer may also be used, but it requires more physical effort. It’s important to leave a small gap between each plank to allow for expansion and contraction. The gap should be about 1/8 inch to 1/4 inch, depending on the width of the planks.
5) Hardwood Floor Finishing: After the hardwood flooring has been installed, it’s time to finish it. The first step is to sand the floor to create a smooth surface and remove any imperfections. Sanding should be done in multiple passes, starting with a coarse grit and gradually moving to a finer grit. Once the sanding is complete, the floor should be vacuumed and wiped down with a tack cloth to remove any dust. Staining and sealing the floor is the final step in the finishing process. This protects the hardwood flooring from moisture and wear and gives it a polished, finished look.
Can You Install Flooring at Home By Yourself?
Nailing down hardwood floor installation is a relatively simple process, but it requires careful preparation and attention to detail. By following these basic steps, you can ensure that your hardwood flooring is installed properly and will provide a beautiful and durable surface for years to come.
Hardwood Floor Installation, Repairs, Refinishing & More in Charles Town & Eastern Panhandle of Berkeley & Jefferson Counties in WV | Winchester & Frederick County | Round Hill & Loudoun County | Berryville & Clarke County | Herndon & Fairfax County VA
To ensure it is done right the first time in Eastern Panhandle of Berkeley and Jefferson Counties in WV as well as Frederick, Loudoun and Fairfax Counties in VA, call Mike’s Custom Flooring and let us take care of you!