Floating hardwood floor installation is a popular and affordable method of installing hardwood floors. It involves attaching individual planks or boards together using a locking system that doesn’t require the use of nails or glue. This type of installation is commonly used for engineered hardwood floors, which are made of a thin layer of hardwood on top of a high-quality plywood base. Today, we at Mike’s Custom Flooring would like to discuss the basics of floating hardwood installation.
Where Do You Start when Installing a Floating Floor?
1) Prep the Subfloor. The first step in installing a floating hardwood floor is to prepare the subfloor. The subfloor must be clean, level, and free of any debris. If necessary, the subfloor can be leveled using self-leveling compound. It’s also important to measure the square footage of the room to determine the amount of flooring material needed.
2) Underlayment. Once the subfloor is prepared, it’s time to lay down an underlayment. An underlayment is a thin layer of foam or other material that is placed on top of the subfloor. It helps to absorb sound and create a barrier between the hardwood flooring and the subfloor. The underlayment is typically rolled out across the room, and the edges are trimmed to fit using a utility knife.
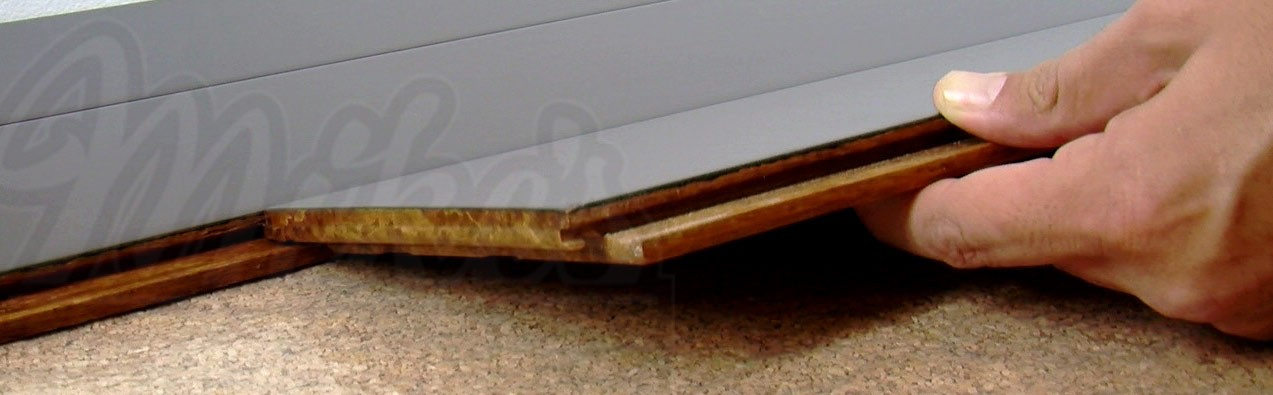
3) Laying the Planks. After the underlayment is in place, it’s time to start laying the hardwood flooring planks. It’s important to follow the manufacturer’s instructions for the specific type of flooring being installed. Each plank is typically clicked or locked into place, starting at one end of the room and working towards the other. It’s important to stagger the planks so that the seams don’t line up. When installing the planks, it’s important to maintain a gap of 1/4 inch between the planks and the wall. This gap allows for expansion and contraction of the hardwood flooring as temperature and humidity levels change. The gap can be covered with a baseboard or quarter round molding after the installation is complete. As the planks are installed, it’s important to use a tapping block and a hammer to ensure that they are snugly in place. A rubber mallet can also be used to gently tap the planks into place. It’s important not to force the planks into place, as this can damage the locking system.
4) Wait Before Walking on Floor. Once all of the planks are installed, it’s important to let the floor sit for a minimum of 24 hours before walking on it or placing furniture on it. This allows the flooring to acclimate to the temperature and humidity levels in the room.
Hardwood Floor Installation, Repairs, Refinishing & More in Charles Town & Eastern Panhandle of Berkeley & Jefferson Counties in WV | Winchester & Frederick County | Round Hill & Loudoun County | Berryville & Clarke County | Herndon & Fairfax County VA
Floating hardwood floor installation is a simple and cost-effective way to install hardwood floors. The process involves preparing the subfloor, laying down an underlayment, and clicking the planks into place. By following the manufacturer’s instructions and taking care to maintain a gap between the planks and the wall, homeowners can create a beautiful and long-lasting hardwood floor. If you are interested in hardwood floors in Winchester, VA and surrounding areas, contact Mike’s Custom Flooring. We provide a number of methods we use to install the hardwood and can consult with you on which is method is best for your circumstances.